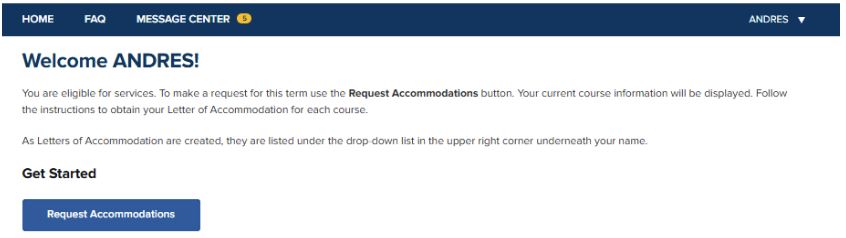
Step 1
- Locate the "Get Started" Section
- Click the button labeled "Request Accommodations." This button has white text on a blue background
Step 2
- To see the available accommodations for your courses, click the link labeled "View Agreements" located in the upper-right corner of the page, next to a pencil icon.
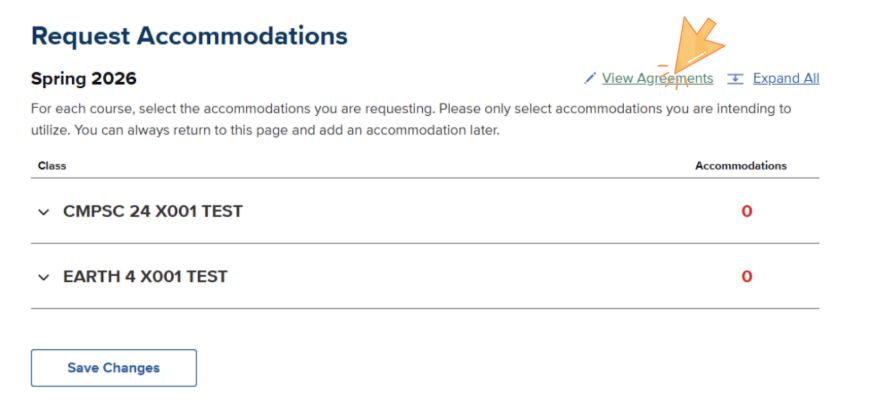
(Visual Aid: An orange arrow in the screenshot points directly to this "View Agreements" button.)
Step 3
Once your accommodations are approved, they will appear in your portal under the Service Agreements section. You must sign each agreement individually to activate them.
- Locate "Agreements Needing Signature."
- Review the list under the "Accommodation name" column (for example, "Private Exam Setting").
- For each item listed, click the corresponding "View & Sign Agreement" button located on the right side of that row.
- Carefully read the full Service Agreement text. Service Agreements include important information, such as:
- How the accommodation works
- Possible exclusions of the accommodation
- Your responsibilities as a DSP student
- Important policies and procedures
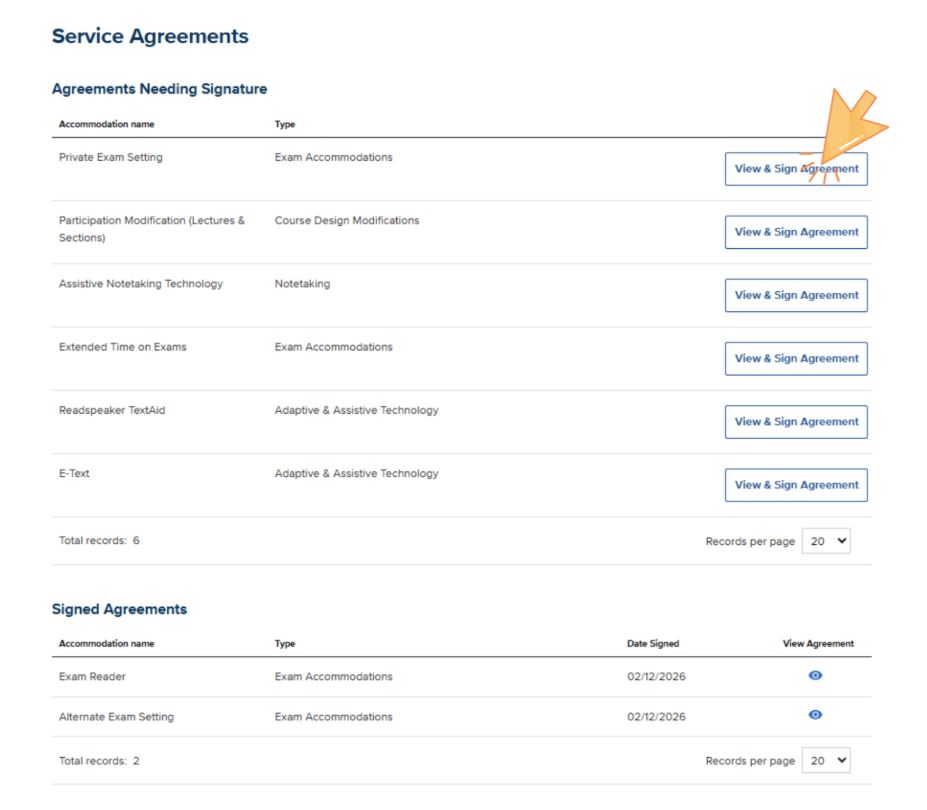
(Visual Aid: An orange arrow in the screenshot points directly to this "View and Sign Agreements" button.)
Step 4
- Locate the checkbox labeled "I Acknowledge & Sign" at the bottom of the page. You must select this checkbox to indicate that you have read and agree to the terms.
- Click the "Submit" button located directly below the acknowledgement checkbox to finalize your agreement. This button has blue text and white background.

(Visual Aid: An orange arrow in the screenshot points directly to this "I Acknowledge and Sign" button.)
Step 5
A confirmation pop-up will appear indicating that the agreement has been successfully signed. When you return to the main Service Agreements page, the accommodation will move from "Agreements Needing Signature" to the "Signed Agreements" section at the bottom of the page. To review a signed agreement at any time, click the eye icon under the View Agreement column to the far right.
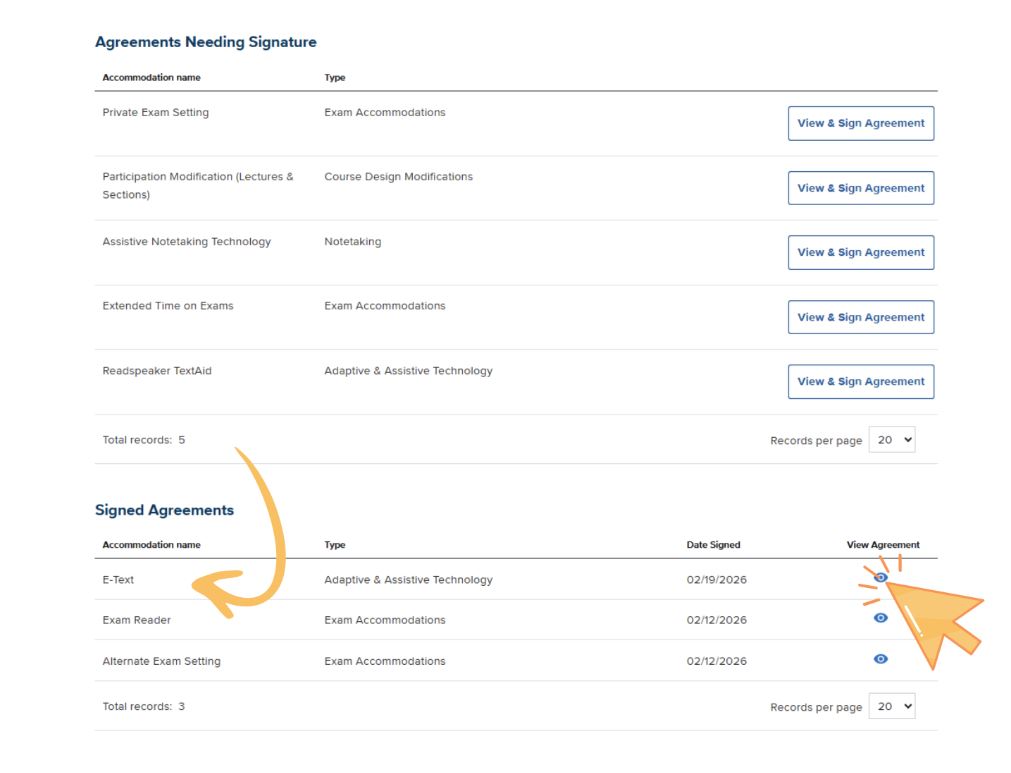
(Visual Aid: An orange arrow in the screenshot points directly to this icon of an eye. Another long arrow indicates that signed service agreements move to the bottom of the page once completed.)
Step 6
Repeat Steps 3 and 4 for all outstanding Service Agreements.
Alternate Pathway for Signing Service Agreements
When you expand a course by clicking on it, you will see your approved accommodations grouped by category.
-
Active accommodations are highlighted in blue with a white checkmark.
-
Look for accommodations that are not highlighted in blue. These may have a notification next to them.
-
If an accommodation shows the text "Needs Service Agreement" (indicated in green), you may click that text or the accommodation's name to review and sign the service agreement for that accommodation.
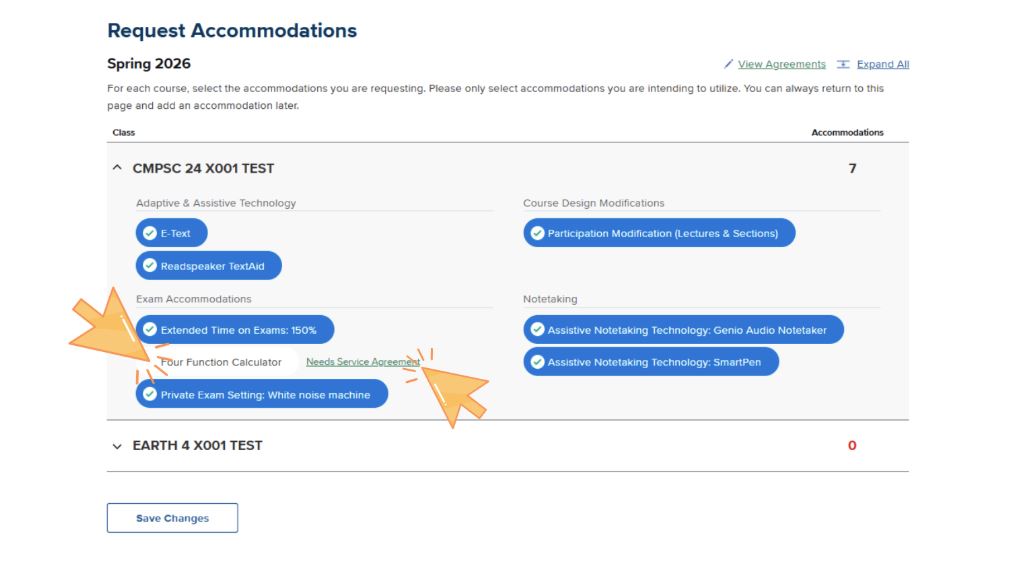
(Visual Aid: An orange arrow in the screenshot points directly to one of the incomplete accommodations, and another points to the "Needs Service Agreements" link.)