Important note: DSP strongly encourages students to submit requests for accommodations as early in the quarter as possible.
Step-by-step instructions and screenshots for how to request your academic accommodations through the DSP Services Portal.
1. Login
Access the Disabled Students Program website at: http://dsp.sa.ucsb.edu/services/ or by clicking on the "DSP PORTAL" button (in yellow along the top of our website):
Enter your User Name (UCSB NetID) and Password and click on the Login button.

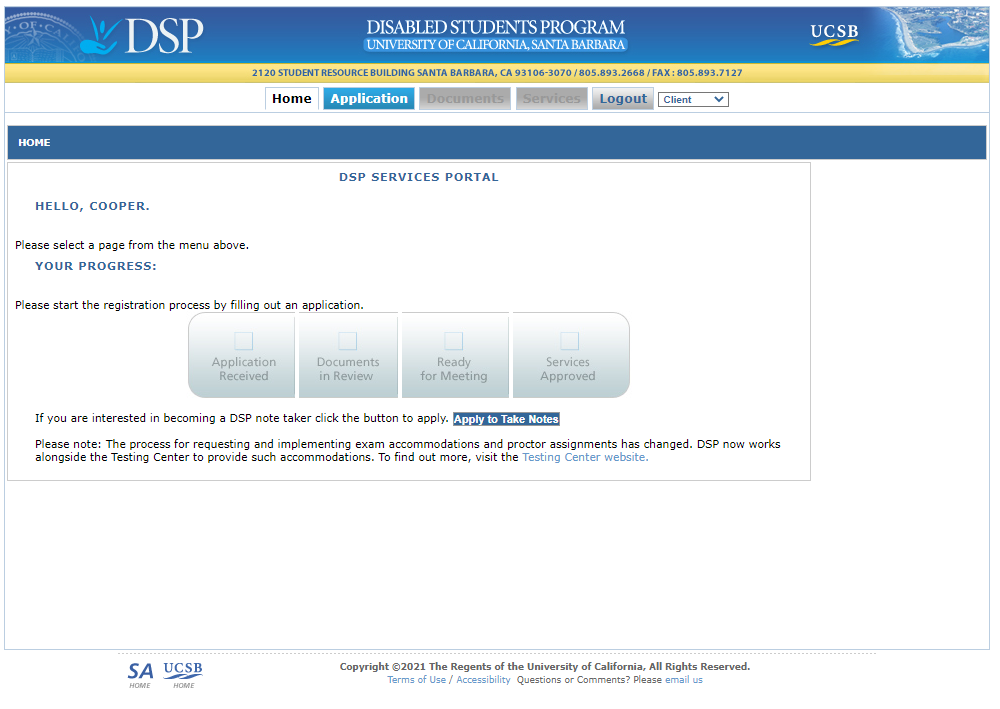
Upon logging in you will be greeted with a screen displaying several tabs:
- Home
- Application
- Documents
- Services
- Logout
The Home Page will also show where you are in the application process. The standard process includes four steps (assuming you meet the criteria to receive services):
- Application Received
- Documents in Review
- Ready for Meeting
- Services Approved
If this is the first time you have visited the DSP Application website, all of the steps mentioned will be grayed out, showing you have not yet submitted an application to our office.
2. Student Application for Services
If this is your first time visiting our website to receive services, the first step is to submit an application. Click on the Application tab at the top of the page, as shown below.
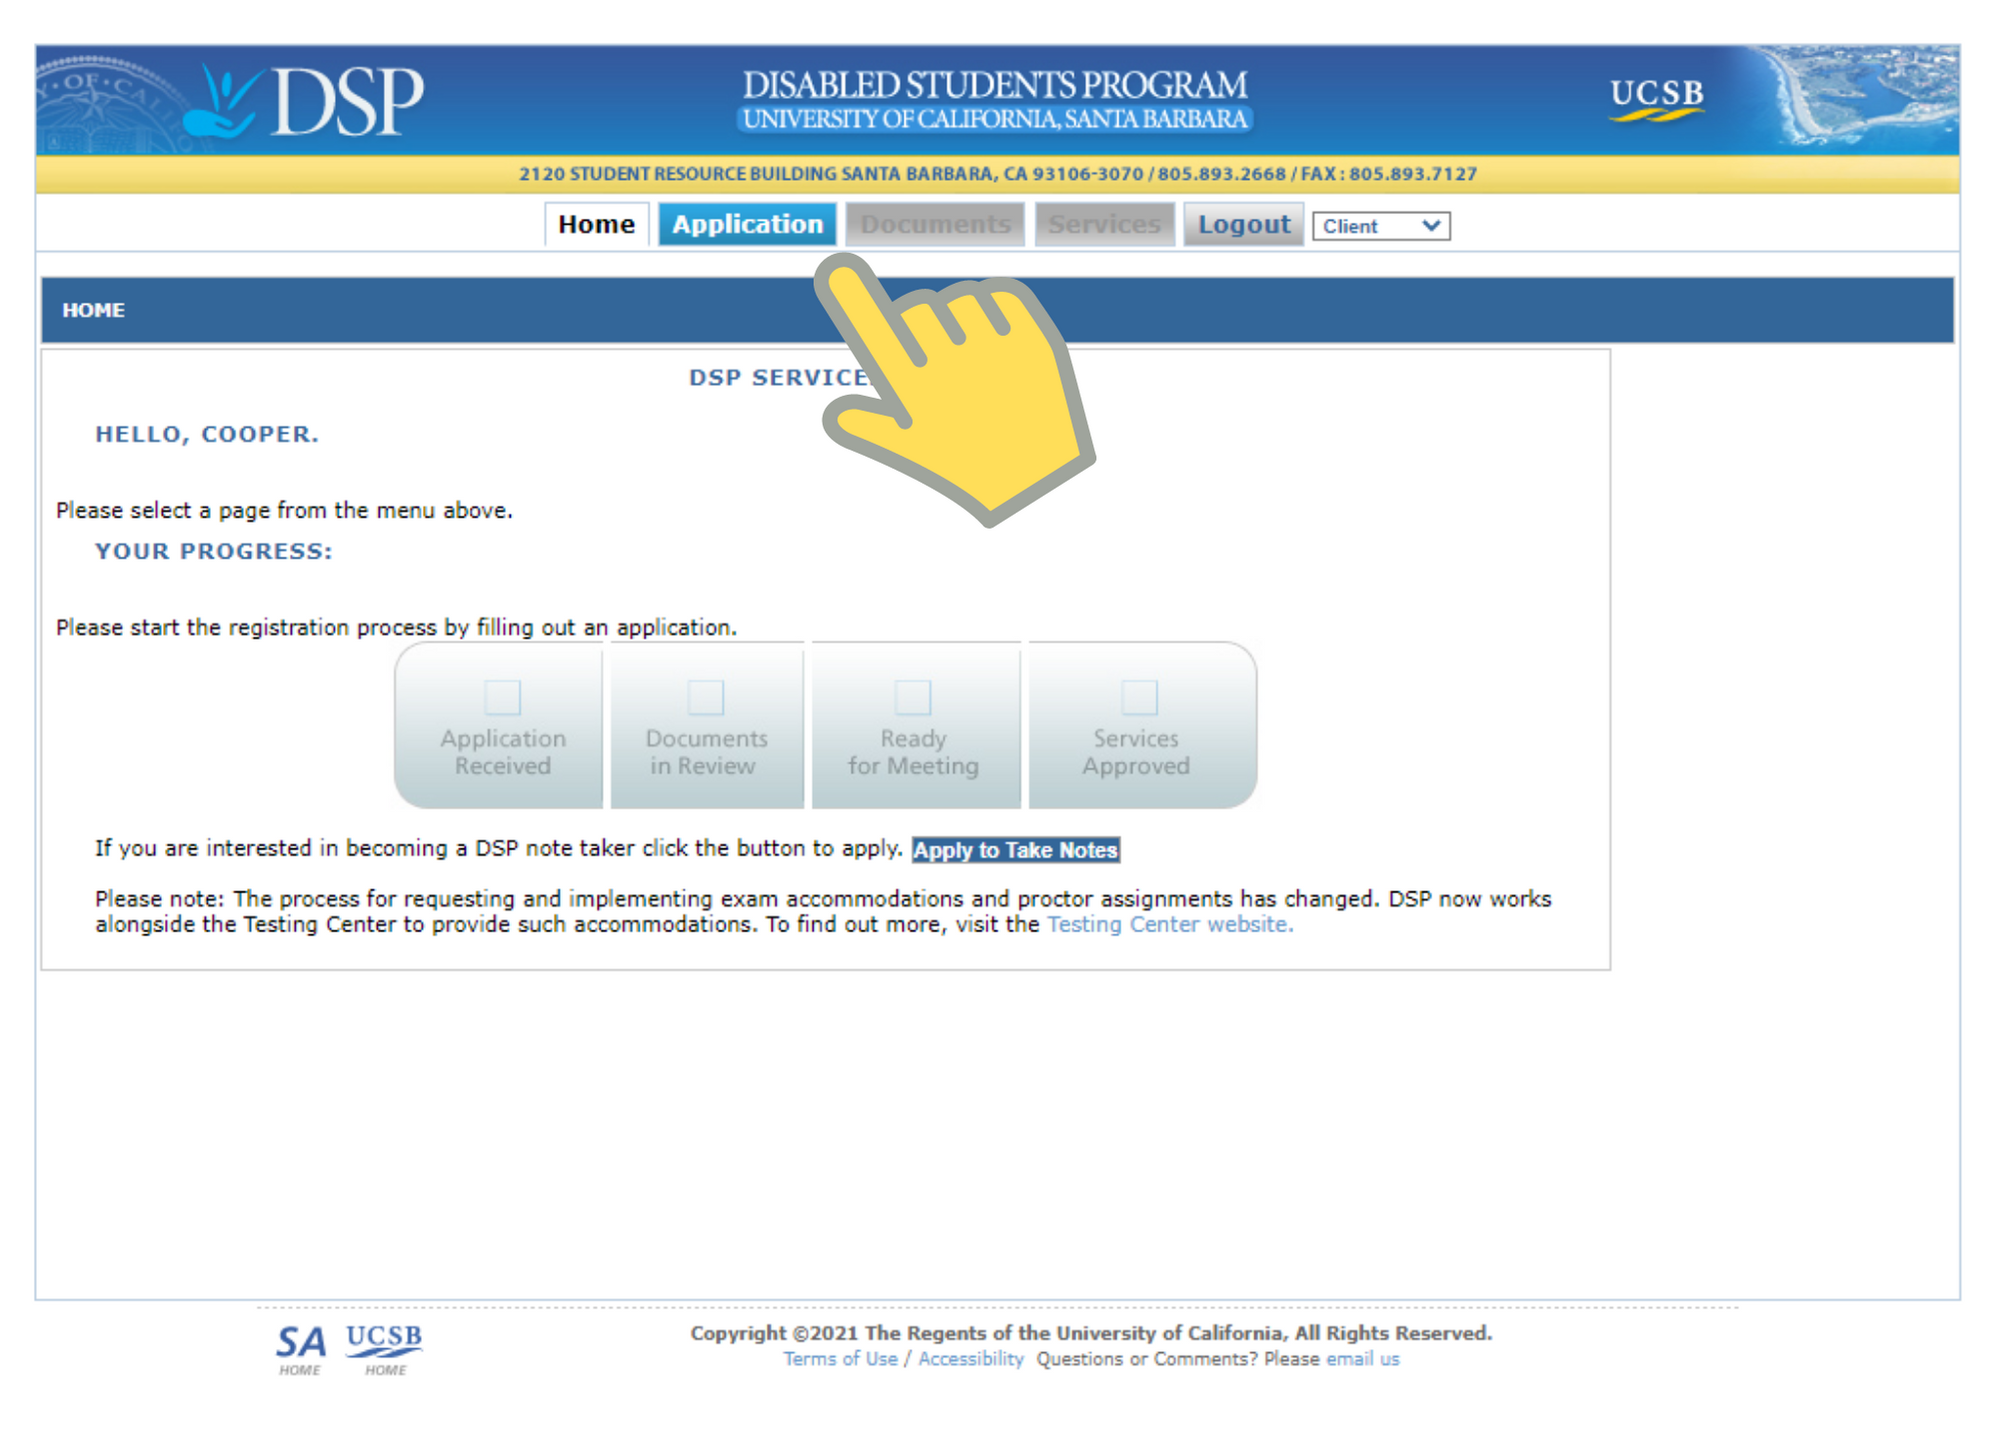
Do not click on the gray boxes; they are not functional. You may be shown the option to “Apply to Take Notes'' or “Apply to Proctor.” Please do not select these options if you are trying to request notetaking services or exam accommodations as a student with our program. Please only click on these buttons if you are interested in applying to work for our department as a DSP Proctor or peer notetaker.
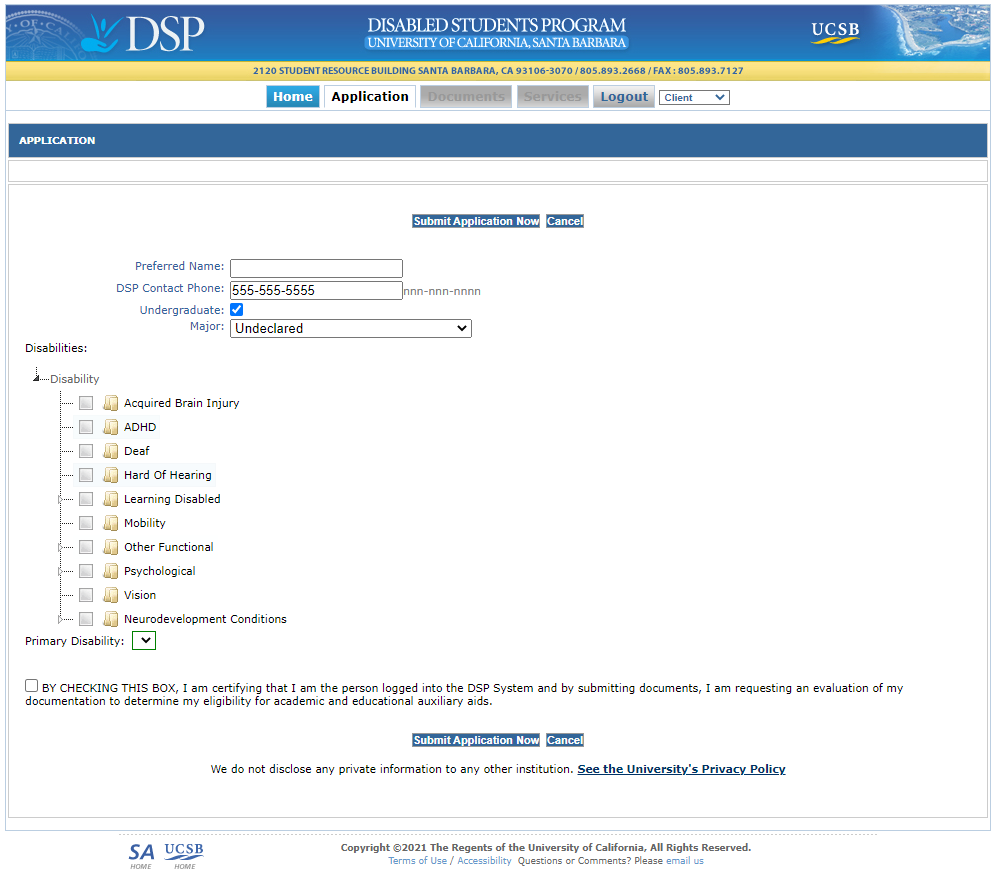
After clicking the “Application” tab, you will be taken to a page with some basic information about you, such as your name, perm number, email address and contact phone number. You will be asked to enter some additional basic information about yourself and your disability:
Preferred Name
If you prefer to be called by a name other than your given name, please enter it in this box, otherwise leave this box empty. You can always change your preferred name by clicking on the Edit button within your Application tab.
DSP Contact Phone Number
This is the number DSP will use to contact you. By default, it will be recorded as the number the University has on file for you. To replace this number with another number that you would like us to use for contact purposes, type it into this box in ten-digit format, including the area code. This is especially important if you are using a cell phone with an area code other than 805.
Undergraduate
If you are an undergraduate student, check this box.
Major
Select your major from the drop down list.
Disability(ies)
Please select one or more disabilities you have from this list. You may choose one or more, but you will be required to provide supporting documentation for each disability you list if you are to receive appropriate services from our office for that disability.
Primary Disability
Please choose what you feel is the disability that most greatly affects your day to day life from this menu. Your choices will be limited to the disabilities you’ve disclosed in the previous step.
User Agreement
Read the agreement listed adjacent to the box. If you agree to the terms, check the box and then click the button marked “Submit Application Now”. This will take you to the next step in the process, submitting documentation.
3. Uploading Student Documentation
After you submit your application, you will be automatically directed to the documentation page:
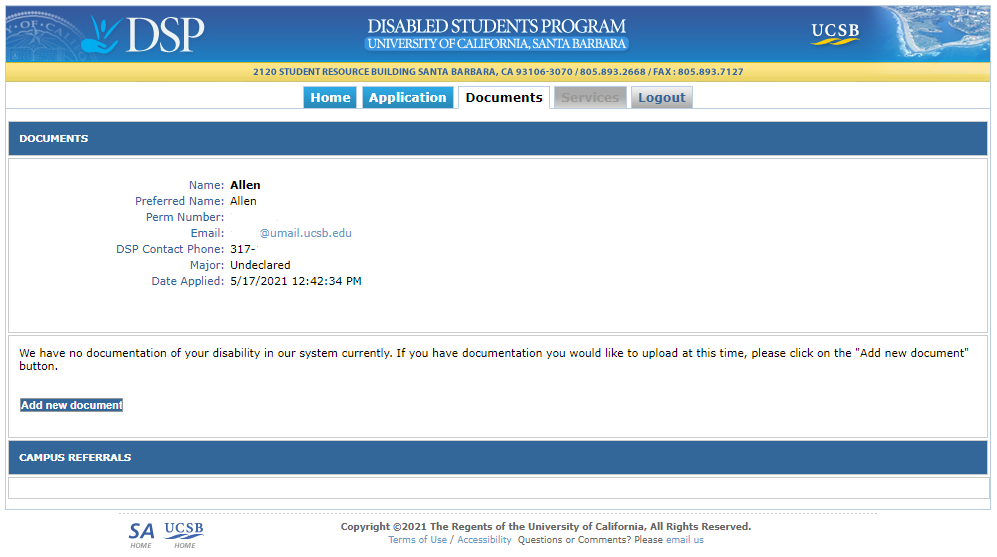
If you would like to upload supporting documentation for your disability (such as educational testing scores, documentation from a physician or psychiatric notes), you may do so at any time. Go to Documentation Guidelines for more information.
- Click on the “Add New Document” button.
- This will take you to a page title “Upload Document(s)”.
- Click on the “Browse” button to open a file navigation window*.
- Navigate to the location where your documentation is stored.
- You may only upload one document at a time so repeat this process for each document you wish to upload.
- When you have located the file you wish to upload, click on the file name. You will see the file name placed into the box.
- In the box labeled “Description” type a brief description of the documentation you are attaching, i.e. “WAIS Revised” or “Letter from Psychiatrist”.
- Then click the “Add This Document” button.
Depending on your connection speed to the Internet, the length of time needed to completely upload a document will vary. Please wait until the hourglass has disappeared before uploading additional documents if necessary. You will see the name of your document appear in the window at the bottom of the screen once your upload has completed.
*Acceptable file types are Microsoft Word documents (*.doc), Text files (*.txt) and Personal Document Files (PDF or *.pdf). File types other than these will not be accepted.
4. Services
Click on the “Services” tab and you will see a list of services for which you have been tentatively approved:
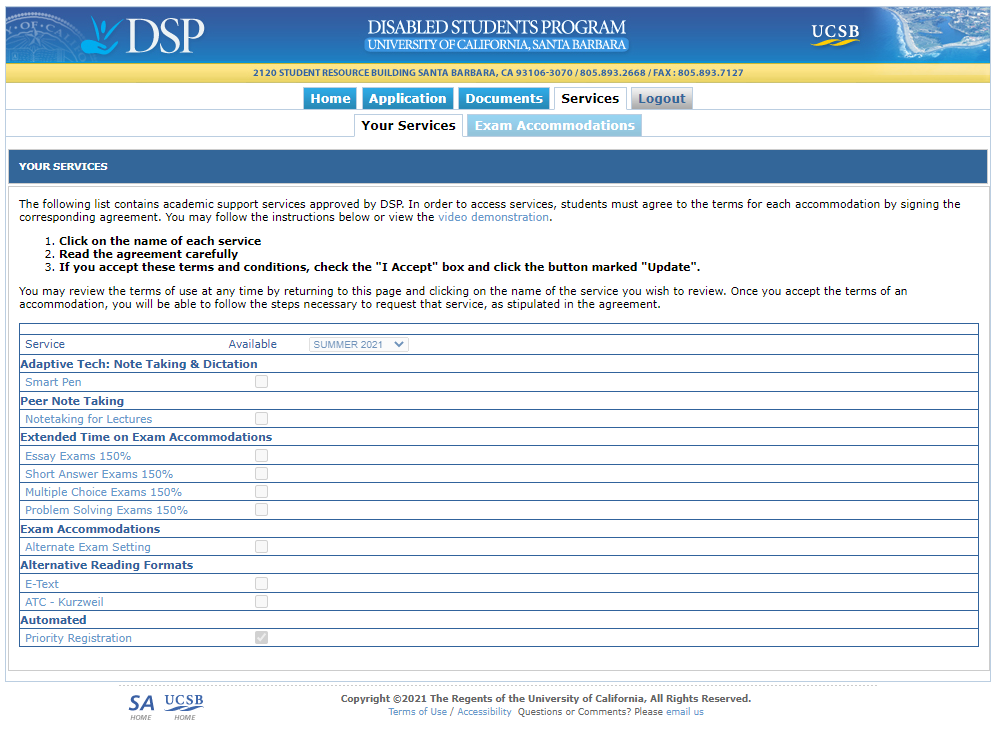
This is VERY IMPORTANT: In order to receive a service, you must click on the name of the service (not the checkbox to the right of it!) for which you've been approved. This will display the user agreement for that service.
In order to access the service, you must read the service agreement, check the box marked “I Accept” and click the Update button to signify that you are agreeing to the rules and responsibilities for the service in question. You will be held accountable for following all service agreements.
How to activate your services
Still a little unclear about how to activate your services? Watch this short tutorial video by Kalli Talafus, DSP's Support Services Coordinator!
Exam Accommodations
1. Instructor Letter Requests
If you qualify for any type of exam accommodation for midterms and finals, click on the tab marked “Instructor Letters”. This will allow you to view your courses and choose one or more courses for which you’d like to submit an instructor letter, notifying them of your exam accommodations.
Please note - If you have been approved for exam accommodations but do not see the Instructor Letters tab, please make sure you have signed your service agreements under Your Services. This tab will not appear until that step is complete.
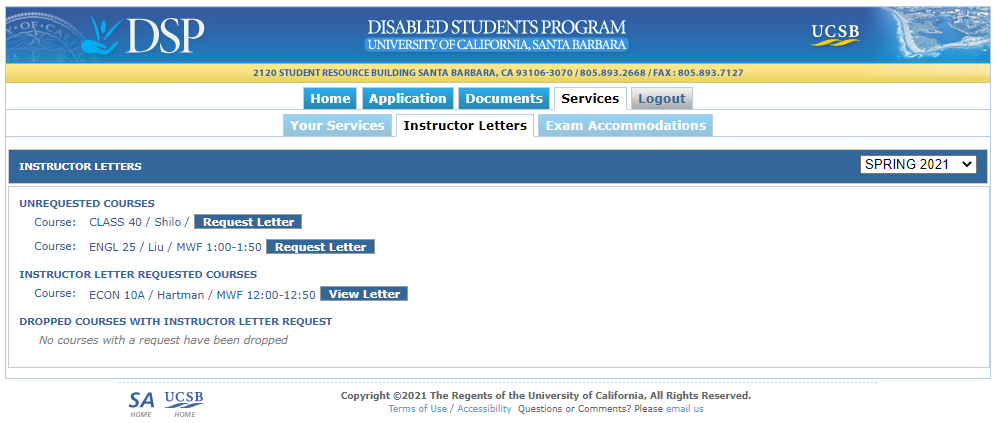
- Click on the box labeled “Request Letter” adjacent to the course for which you’d like to request an instructor letter. The system will display a summary of the information being sent to the instructor, and an instructor letter agreement.
- Read the agreement and click on the box to signify your acceptance of this disclosure.
- Click the button labeled “Submit Course Accommodation Request”.
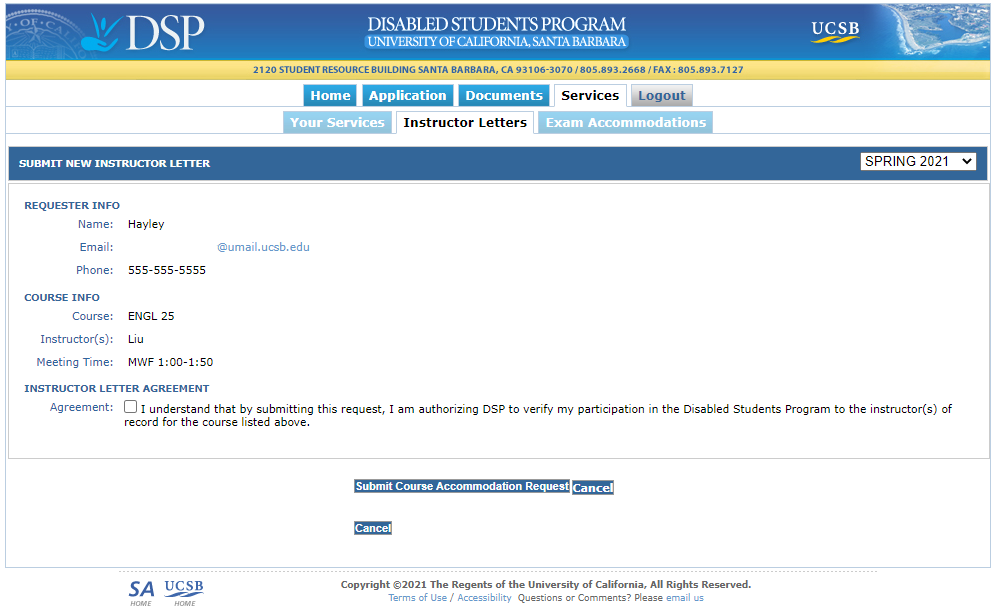
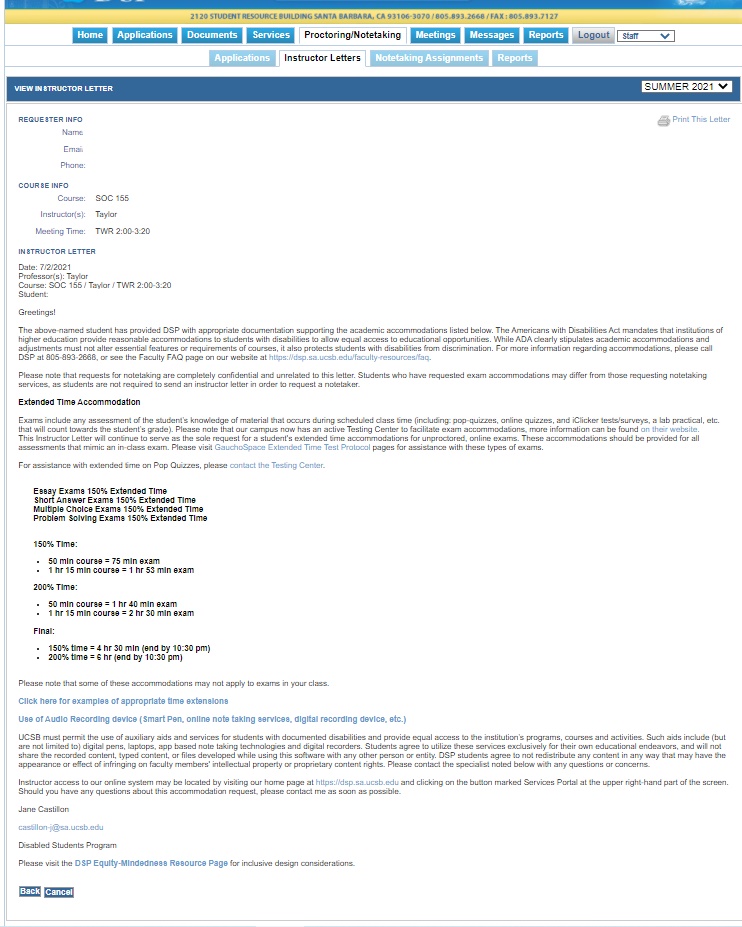
The system will display for you a copy of the letter which has been sent to your instructor. You may choose to print a copy for your records at this time as well.
2. Requesting Exam Accommodations
Once you have submitted an Instructor Letter for an exam, you will be able to submit Proctor Requests for that class.

- Click on the Proctor Requests tab. This will display a list of Proctor Requests in various stages of completion.
- Find the course for which you would like to submit a new Proctor Request under the heading of “Submit New Proctor Request”
- Click on the adjacent button marked “Request Proctor”
- A new Proctor Request page will load with some of the information pertaining to that course filled in already. You will need to input your exam date and select any and all services you believe pertain to the exam you will be taking. Please consult with your instructor and use common sense when making these choices (i.e. do not check off “Multiple-Choice Problems” for an English class or “Essay Exams for Math 100 unless you know for certain these types of questions will be asked on the exam).
- Click on the continue button.

The release authorization shown below will load. You will need to check the box and click the Submit button in order to complete processing your Proctor Request. You may also choose to Edit or Cancel this request prior to submitting.

3. Completed Requests
Once your instructor has completed his or her portion of the Proctor Request, it can be found under the Completed Requests tab. There are three headings on this page:

- Unfilled Accommodations: Proctor requests which do not yet have an assigned proctor
- Filled Accommodations: Proctor Requests which have an assigned proctor
- Completed Accommodations: Proctoring requests which occurred in the past
You may view the details of your accommodations at any time by clicking on the View Accommodation button adjacent to the request you’d like to review.
This is how a typical request will look:

Please take special note of the Exam Location as this is where your exam will be administered and it may not be the same location as the classroom where the course is taught.
Accommodation Requests for Remote Exams
For exams taking place remotely (i.e. at home), you will notify instructors about exam accommodations through the Instructor Letter alone, unless your exam is still being proctored using Zoom or other monitoring platforms (ProctorU, Gradescope, etc). In this type of exam arrangement, you should continue to submit proctor requests so that we can have a DSP proctor assigned for the purpose of proctoring these exams.
NOTETAKING
1. Submit Schedule
If you are eligible to receive notetaking services, you must submit a request for each course for which you would like to receive notes. When you click on the Submit Schedule tab, you should see a list of all your currently enrolled courses. You must make sure the box adjacent to each course for which you would like to receive notes is checked prior to clicking on the Submit/Update Schedule button. If you would like to remain anonymous to your notetaker, please check the box adjacent to each course for which you would like to remain anonymous.

If at any point you drop a course, you MUST inform us as soon as possible by returning to this page and removing the dropped course from your notetaker request list.
2. Notetaking Requests
Once you have submitted a request for notetakers, you can track the status of your requests under the Notetaking Requests tab. If there has not yet been a notetaker found for your class, the status will indicate that the class is Unfilled. Once a notetaker has been hired, the status will be changed to Filled. And at the end of the quarter, once the notetaker has been paid, the status will read Paid.
The "Letter(s) Sent" column refers to email notices we have sent to your instructor asking them to announce that a notetaker is needed. These letters are sent only if a notetaker is unavailable when you submit your notetaking request; if one is available, we will assign them and the course may read "No Letter Sent (N/A)". If you see that a letter has been sent but you have not heard or seen an announcement from your instructor (either in class or via an email/Gauchospace), please contact us immediately so that we can follow up with your instructor.
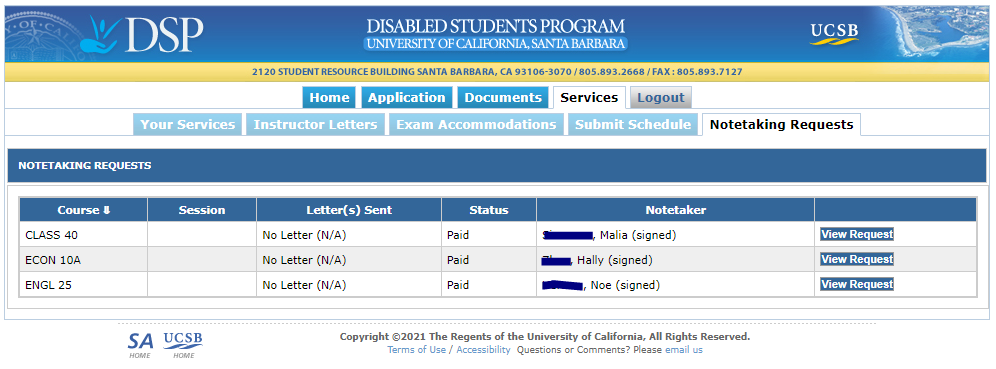
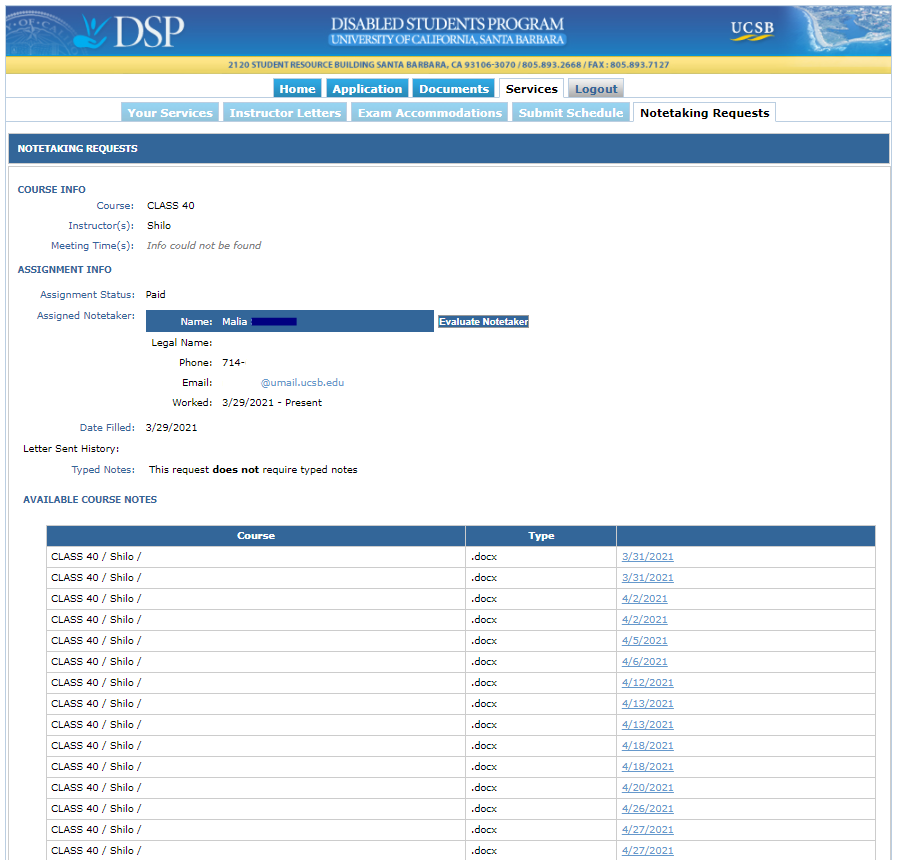
If you would like the view the specifics of your notetaking request or download notes that have been submitted by your notetaker, click on the View Request link adjacent to a notetaker request and view the assignment. Notes may be downloaded by clicking on the hyperlinked date on the right-hand column of each set of notes.
If you have any further questions on how to use the DSP System, please contact our front desk at dsphelp@sa.ucsb.edu.